Lino printing: my experience

Welcome to the Cosy Craft Club's lino printing month! We really want to encourage you to have a go at lino printing yourself, and we'll be sharing the key things you need to know to get started. You can find all our lino printing posts in one place here.
Having had tried lino printing a couple of times myself now, and spoken to a few people who know more about it than me, I thought I'd share what I've learned about lino printing and how to make a print. I hope you'll be inspired to try it too!
There are two stages to lino printing: carving and printing.
A good place to start with carving is to use a small piece of lino to practice making marks on. Try each blade and see what different cuts you can make with them e.g. thickness, length, curves. You could also try making some shapes and see what is easier to carve than others. Your marks may also inspire your design!

Once you’ve got to this point it’s worth thinking about what design you’d like to print. If you’ve got no idea, try looking for lino prints on Instagram or Pinterest to see what other people have done - bear in mind that most of these will have been lino cutting for some time! Simple shapes and patterns are a good place to start, or you could carve an outline into the block for a ‘negative’ style print. I’ve created a lino printing Pinterest board for inspiration.

Draw out your design a few times until you’re happy with it. It can be quite useful to hatch out the areas that will be left (i.e. the bits you want the ink to print) so you know where you’ll need to cut away.
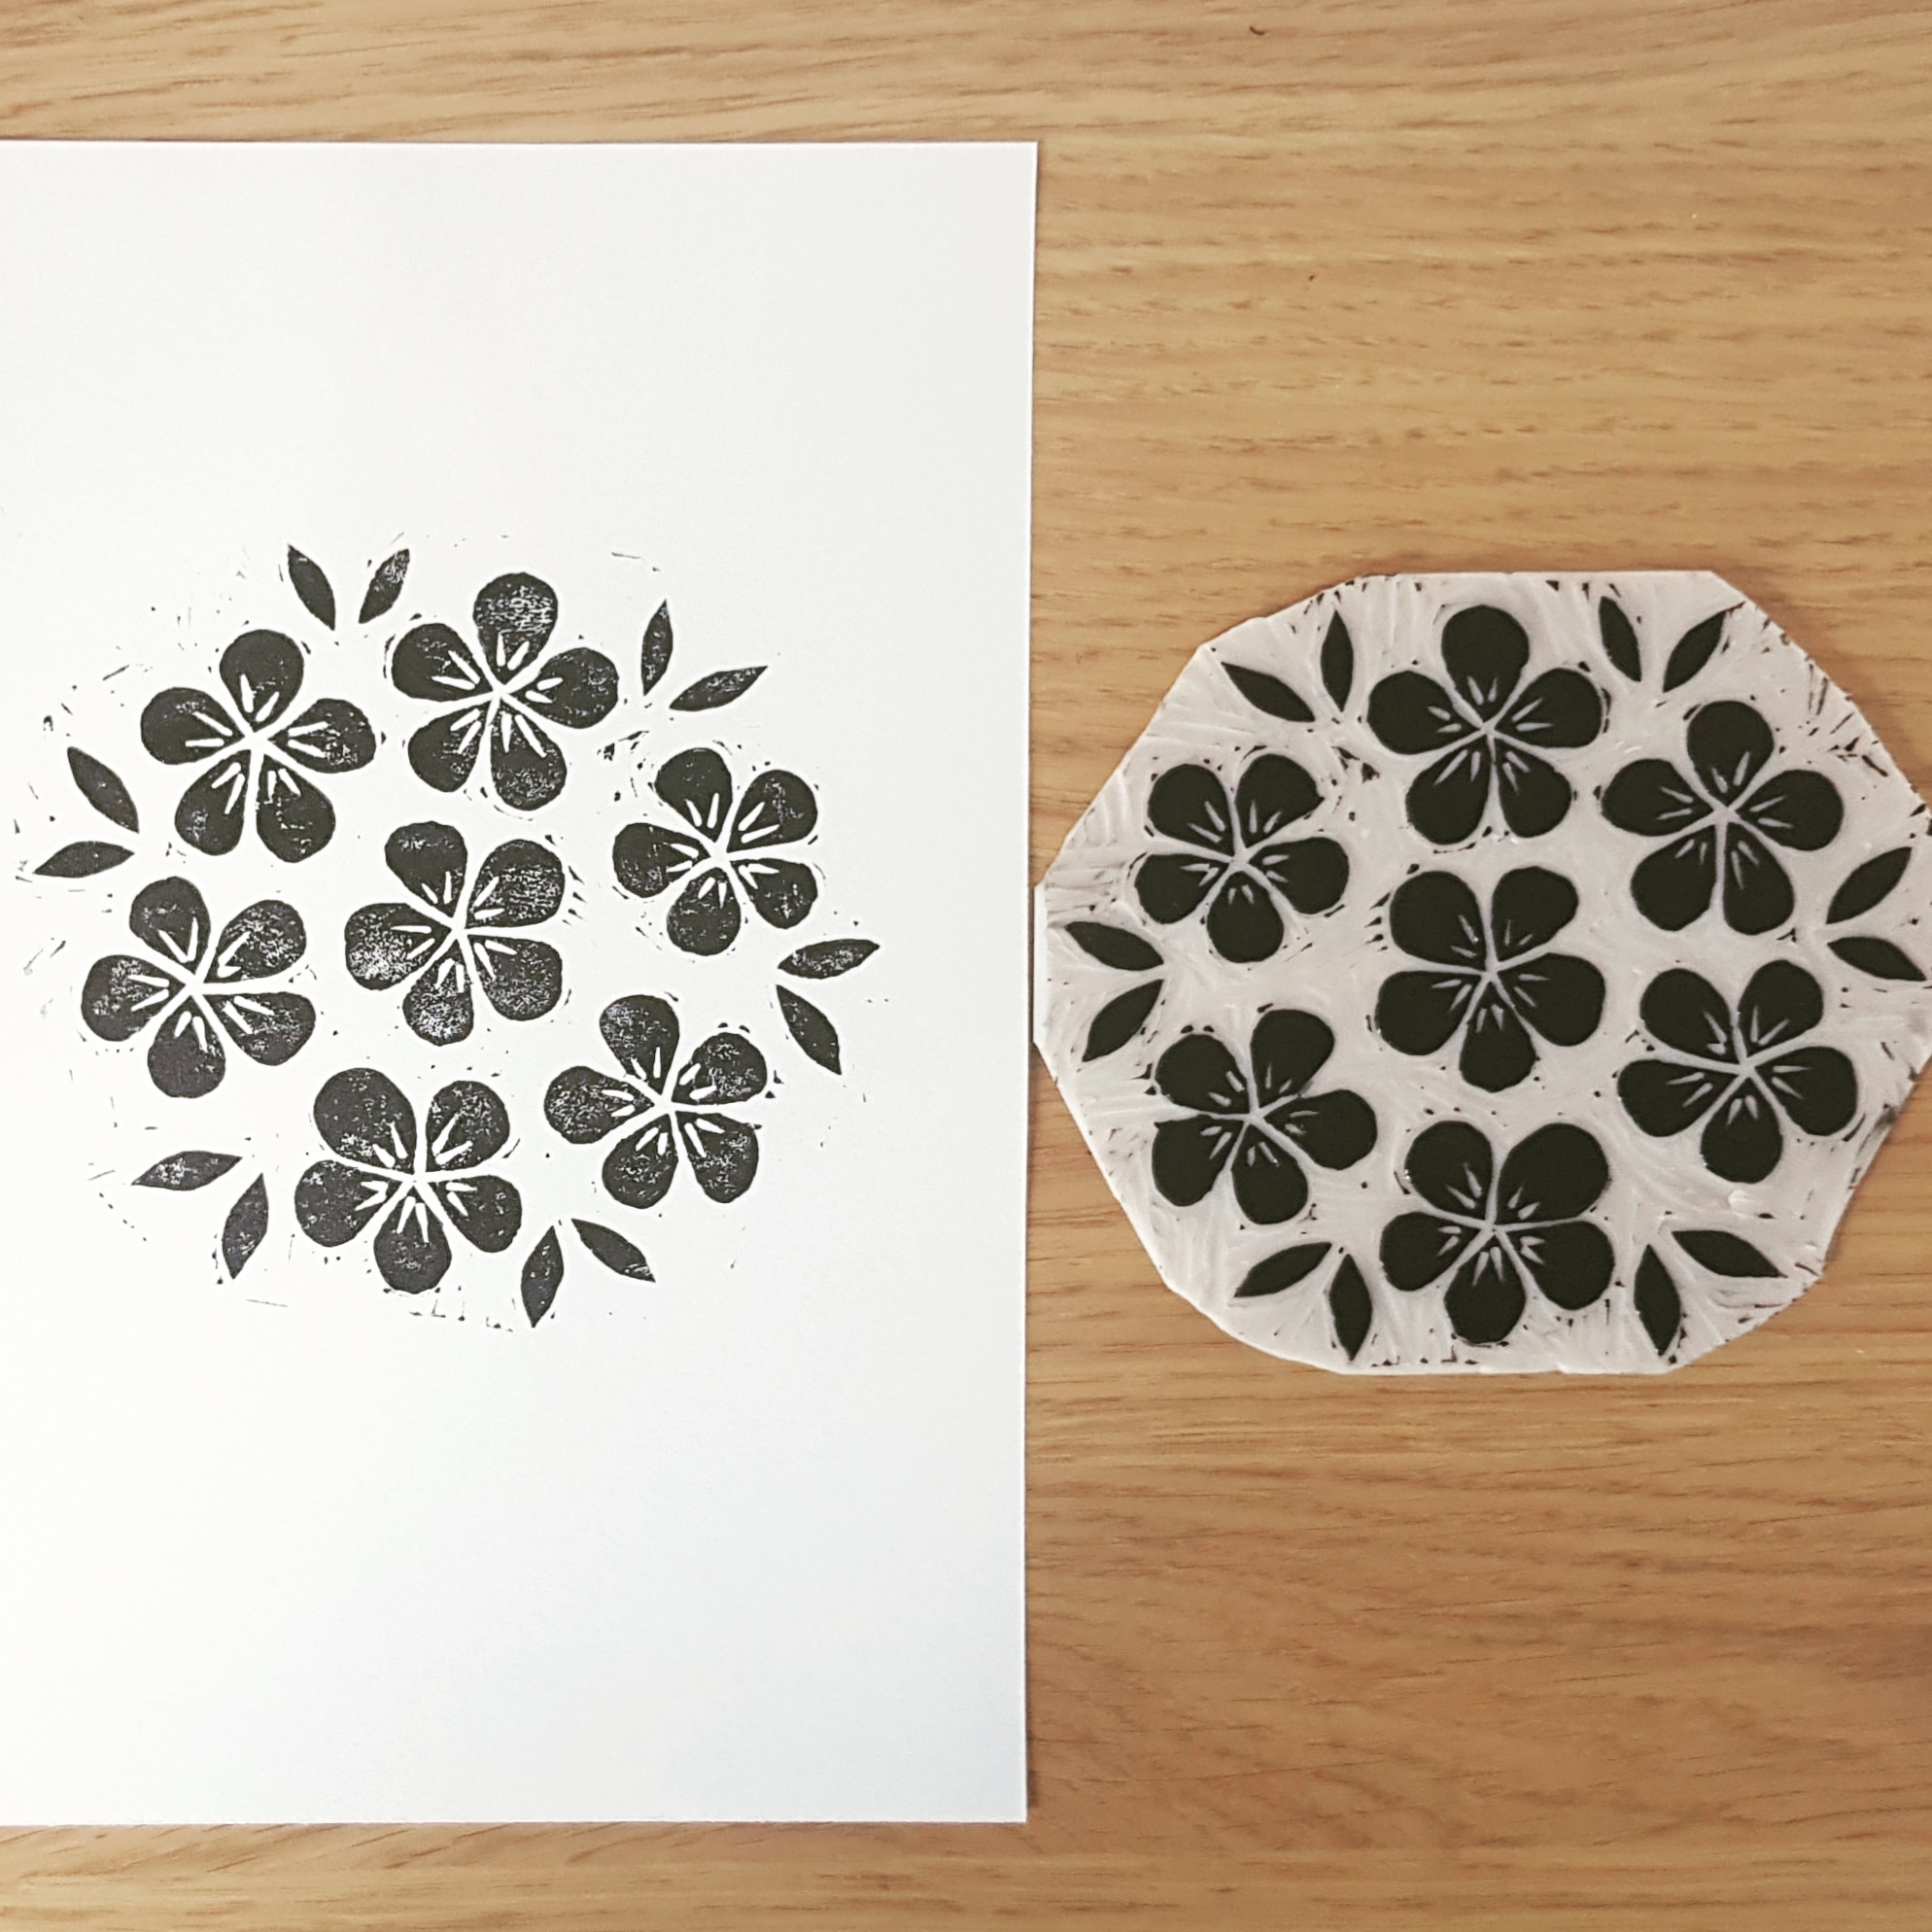
Use your other small piece of lino to practice elements of your design. Mine was a floral design, so I had a go at a couple of flowers. It was harder than I expected to get the curves on the petals smooth and where I wanted them - straight lines are much easier to carve!

Transfer your design to the large piece of lino using the tracing paper. To do this, place the tracing paper over your design and draw the lines you want to carve in pencil. I would suggest going over these lines again so the pencil is quite heavy. Then, turn the tracing paper over onto the lino so the pencil lines are in contact with the lino, and draw over the lines from the other side, pressing quite hard. This should be enough to transfer the design onto the lino - and your image will be mirrored (which is important because your print will be a mirror image of your lino carving). This is especially useful if you’ve got something like text that will be obvious if it’s backwards when you make your print! It’s a good idea to go over the lines in pen so they don’t rub away easily.
Now for the fun bit - the carving! Place your lino on a non-slip mat (if you have one) before you begin. Use your tool to first go round any outlines that you’ve made. I would suggest making quite thin, light cuts to start with. One of the golden rules in lino cutting is to always cut less away than you want to start with - you can always cut more away later but you can’t put it back if you’ve taken too much away!

Another golden rule is to always carve away from the hand holding the lino. I forgot this at one point, and the tool slipped! I had a nasty gash in my finger, which thankfully healed quickly, but I won’t do that again in a hurry!
Once I’d gotten the fiddly bits out of the way, I really enjoyed the carving. It’s pretty repetitive and very rewarding to see your lino cut taking shape.

The next stage is printing. The moment of truth! The one thing not included in the kit is something to roll your ink out on, but there are lots of things you can use for this. I used an old plastic plate, but you could also use a plastic board or a piece of toughened glass. It just needs to be flat, non-porous and wider than your roller.
Rolling out the ink is more of an art than you expect. Start with a small blob of ink - again it’s easier to add more than take it away if you’ve got too much. You then need to keep rolling and turning your surface until the ink is spread over an area at least as wide as your roller and is quite an even matte finish (no large peaks). I was told to listen for the hiss when it gets smooth enough.
Once your roller is covered in a thin, smooth layer of ink, roll it lightly over your lino cut until all the raised areas are covered. If your ink layer is too thick, it will bleed down into your cuts and affect the crisp-ness of your finished print so inspect it to check for this.

Place a piece of paper carefully onto the lino and press down firmly with the heel of your palm or a spoon over all the inked areas to ensure an even print. Lift the paper away and you have your first print!
If there are areas that have been inked that you didn’t want to print, simply cut them away with your cutter and try again. If you have issues with the print quality, practice with different amounts of ink and burnishing techniques.
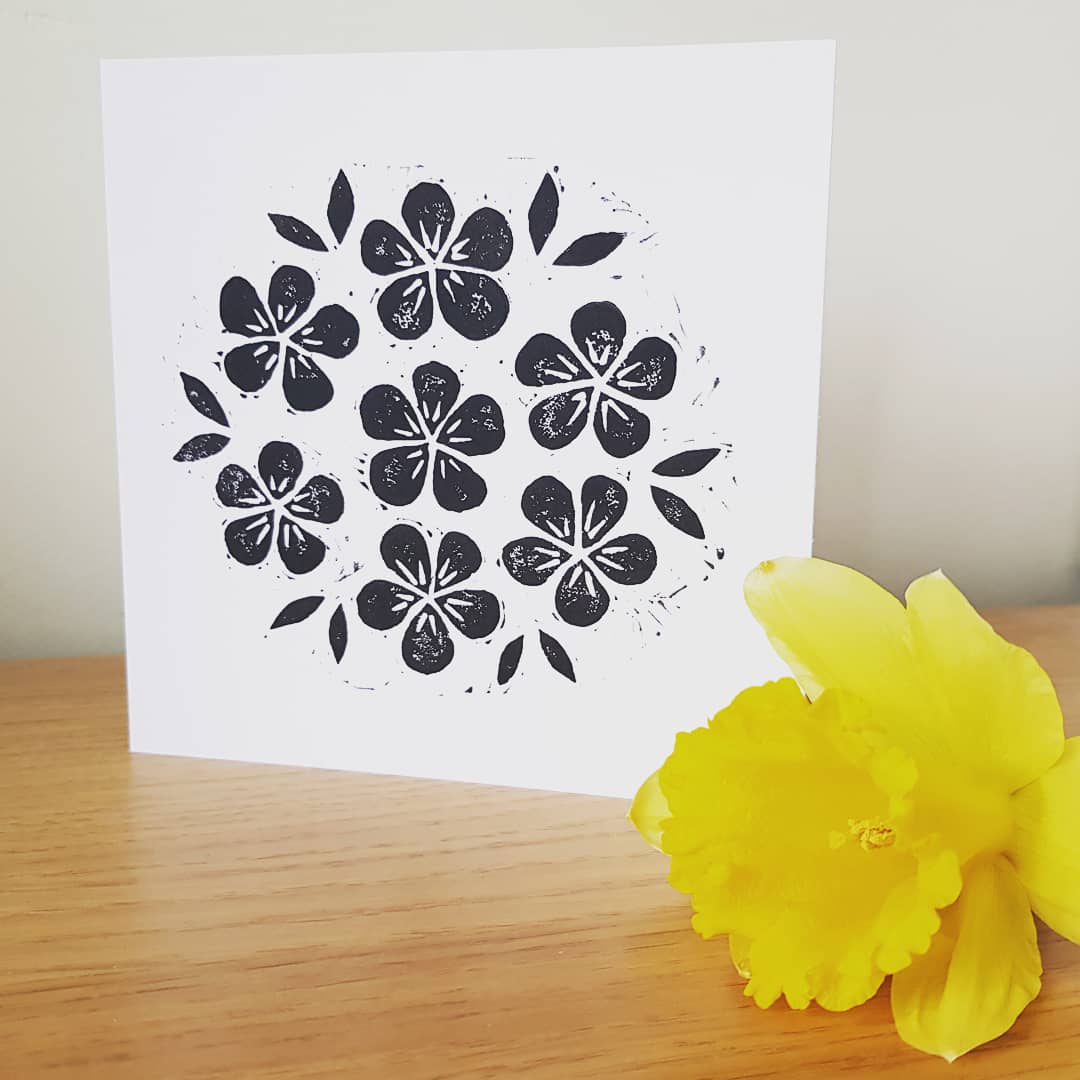
Once you’re happy with your print, you can repeat it as many times as you like. My design was for a Mother’s Day card, which I repeated twice - once for my mum and once for my mother-in-law. I also printed off a few extra copies to hang on the wall and give as cards for other occasions!
I hope that this has shown you that creating a lino print is pretty straightforward, and it doesn’t have to be fantastically detailed or ‘arty’ to look good. If you want to have a go yourself, you can buy one of our lino kits in our Shop - everything you need to make your first print is included.
Rachel x